Before You Begin
Ensure that your lab computers meet our Minimum System Requirements.
Antivirus Concerns
ExamSoft works with the major antivirus providers to be included in their signature-based exceptions. However, issues might arise with some antivirus applications when they use heuristic detection methods that view the securing and unsecuring behavior as malicious. This can usually be addressed by adding the Examplify directory to the exceptions list in the antivirus console.
If you are experiencing false positives via signature-based detection, you may need to create an exclusion rule to exclude the full Examplify directory. Please contact your Customer Success Specialist with screenshots or a log from the antivirus console so that we can resolve the issue with the antivirus vendor.
Network Drive
At this time, we do not offer support for networked storage of Examplify-related files. Examplify needs to be able to access files immediately after restarting the machine to resume an interrupted exam. Most network drives mount after logging in, and Examplify will miss the mid-exam restart trigger.
Administrator Account
Examplify must be installed with administrator permissions, but will not need administrator privileges when exams are in progress.
Mass Distribution
ExamSoft will assist with the configuration of the first machine’s installation of Examplify. You may then capture an image of this machine or configure the remainder of the devices manually.
We do not provide imaging support for mass distribution. Please contact the respective vendor for assistance with deploying images or managing software packages.
ExamSoft does not have a supported MSI that we can provide to you. Also, please note that Examplify does not currently support scripted or silent installs.
Mock Exam to Validate Configuration with Deep Freeze
We recommend that you administer a mock exam that includes an essay question, and type some content in the essay question answer field. To simulate a mid-exam crash, wait about three minutes, and then shut down the machine by using the power button. When you restart the machine, Examplify should return to the exam and display the saved content that you entered for the essay question. If so, then you have validated that the persistent storage is working properly.
The computer now needs to be rebooted into a frozen state. Afterward, your exam-takers can begin to log in to the machine and take their exams. All Examplify working files will be retained.
Setup a Windows Lab
This is a detailed technical guide with an audience of information technology employees at an institution. Depending on your deployment, you may be required to have administrator privileges to systems management software or be able to run PowerShell/terminal commands on devices.
Verify Existing Lab Setup for Windows
-
Ensure that your device is set up correctly as a lab device. If lab.datn file is present in your C:\ProgramData\Examplify directory, the device is properly registered as a lab device.
- If you do not see this file in the above directory, and you are not installing 3.5.0 or later, you will need to perform a clean install. Click here to learn how.
Which Lab Setup should I use?
Windows Lab using Systems Management Software
- Uses systems management software (such as Kaseya or Intune) to install.
- Ideal in situations where you cannot be on-site to complete each individual installation.
- Setup is for systems using Examplify 3.3.2 and greater.
Windows Lab using PowerShell
- Best for users who wish to type in a command on PowerShell and install it without using prompts.
- Ideal in situations where you may be on-site to do individual installations, but your institution may or may not use systems management software.
- This setup is for systems using Examplify 3.3.2 and greater.
Windows Lab using Manual Installation
- A typical installation where you will install Examplify on each device.
- Ideal in situations where you may have a few loaned devices or a very small lab and do not need to utilize scripts to install software.
- This setup is for any version of Examplify.
Examplify 3.3.2 and Greater
Version 3.3.2 and beyond allows for an unattended installation of Examplify for lab computer systems.
Set Up Your Windows Lab using Systems Management Software
This version of the installation uses systems management software to install. This is most ideal in situations where you cannot be on-site to complete each individual installation.
- If you’re using a single-sign-on, such as SAML or LDAP, note that you must be Examplify version 3.4.0 or higher. 3.3.2 does not support the ‘Remember my Institution’ feature.
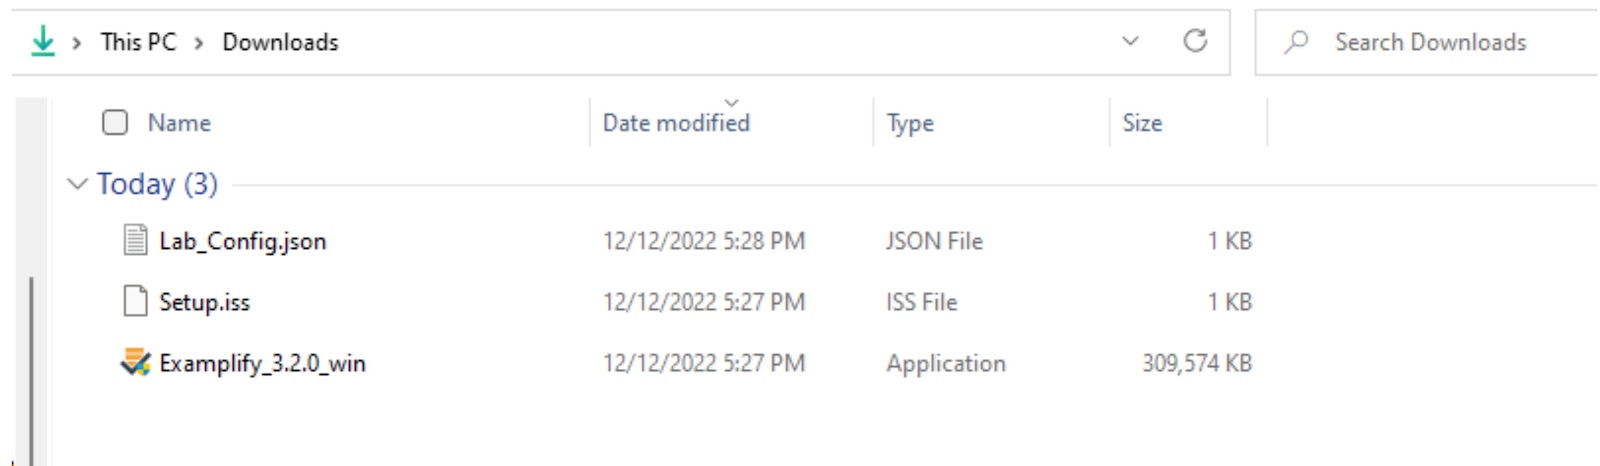
Before you begin, you will need three files:
- ISS File (contact Support for this file)
- JSON File (contact Support for this file)
-
Examplify version 3.3.2 or greater
- Download the Windows installer for Examplify 3.3.2 or greater from this location.
- Optional: It is recommended that you create a persistent storage path if your lab utilizes a systems management software. If your institution does not utilize a systems management software, you can skip this step.
- Systems Management Software products are applications that institutions use to manage lab computers and restore installations to original configurations. ExamSoft currently supports many systems management software if they can set a persistent storage path.
- A persistent storage path needs to be created for Examplify to write its working and backup files. This is a separate partitioned space on the computer's hard drive disk.
- The existence of a persistent storage path will prevent you from receiving silent updates (refer to Examplify Updates section).
- Required: Inform Turnitin Support of this path, so they can ensure Examplify is configured to save information to this path by default. This must be provided before your config file can be delivered to you.
- The persistent storage path must be partitioned on the computer's hard drive disk. If the persistent storage is set on a network drive, Examplify will not write to it.
- Install Examplify in your lab environment.
This needs to be installed with administrator privileges or credentials.
-
Download Examplify
- You can use these links to download the installers for the latest version of Examplify.
- If the download does not start after you select the link: Copy the link and paste it into a new browser tab or window.
- Save the ISS and JSON File from Turnitin Support to the same directory as the Examplify executable file.
- Using your software distribution system (such as Kaseya or Intune), run the installer using this command:
.\Examplify_<version>_win.exe /s /v" /qn REBOOT=ReallySuppress" /z"C:\<path>\setup.json"
Notes:
- Where setup.json = the name of your config file.
- If your JSON file contains SavedInstitutionDataForLabCopy for setting a default institution, an internet connection is required.
Note: If you have completed this process once and are doing an UPDATE to Examplify, the command is:
.\Examplify_<version>_win.exe /s /v" /qn REBOOT=ReallySuppress"
-
Finalize and verify the installation by spot checking a few of the machines.
- Ensure that Examplify starts and that the End-User License Agreement displays.
- Use any student credentials to login and ensure it connects to the correct institution.
You do not need a lab user account to complete this installation process.
Set Up Your Windows Lab using PowerShell
This is ideal in situations where you may be on-site to do individual installations, but your institution may or may not use systems management software. This installation is best for those users who wish to type in a command on PowerShell and install it without using prompts.
- If you’re using a single-sign-on, such as SAML or LDAP, note that you cannot use the Remember My Institution checkbox until a future release of Examplify.
Before you begin, you will need three files:
- ISS File (contact Support for this file)
- JSON File (contact Support for this file)
-
Examplify version 3.3.2 or greater
- Download the Windows installer for Examplify 3.3.2 or greater from this location.
- Optional: It is recommended that you create a persistent storage path. If your institution does not want to set up a persistent storage path, you can skip this step.
By skipping this step, Examplify will install to the default directory.
- A persistent storage path needs to be created for Examplify to write its working and backup files. This is a separate partitioned space on the computer's hard drive disk.
- The existence of a persistent storage path will prevent you from receiving silent updates (refer to Examplify Updates section).
- Required: Inform Turnitin Support of this path, so they can ensure Examplify is configured to save information to this path by default. This must be provided before your config file can be delivered to you.
- The persistent storage path must be partitioned on the computer's hard drive disk. If the persistent storage is set on a network drive, Examplify will not write to it.
- Install Examplify in your lab environment.
This needs to be installed with administrator privileges or credentials.
-
Download Examplify
- You can use these links to download the installers for the latest version of Examplify.
- If the download does not start after you select the link: Copy the link and paste it into a new browser tab or window.
- Save the ISS and Configuration File from Turnitin Support to the same directory as the Examplify executable file.
- Open PowerShell.
- Change your directory to the location where you stored the above 3 files.
-
Run the installer using this command.
-
.\Examplify_<version>_win.exe /s /v" /qn REBOOT=ReallySuppress" /z"C:\<path>\setup.json"- Where setup.json = the name of your config file.
- If your config file contains SavedInstitutionDataForLabCopy for setting a default institution, an internet connection is required.
-
Note: If you have completed this process once and are doing an UPDATE to Examplify, the command is:
.\Examplify_<version>_win.exe /s /v" /qn REBOOT=ReallySuppress"
- This installation takes about 15-30 seconds.
- Reminder: No prompts will be visible during installation.

-
Finalize and verify the installation by spot-checking a few of the machines.
- Ensure that Examplify starts and that the End-User License Agreement displays.
- Use any student credentials to log in and ensure it connects to the correct institution.
You do not need a lab user account to complete this installation process.
Set Up Your Windows Lab using Manual Installation
This is ideal in situations where you may have a few loaned devices or a very small lab and do not need to utilize scripts to install software. This is a typical installation where you will install to each device.
Before you begin, you will need:
- Examplify lab user account
-
Downloaded copy of Examplify
- Download the Windows or macOS installer for Examplify from this location.
- Optional: It is recommended that you create a persistent storage path. If your institution does not want to set up a persistent storage path, you can skip this step.
By skipping this step, Examplify will install to the default directory.
- A persistent storage path needs to be created for Examplify to write its working and backup files. This is a separate partitioned space on the computer's hard drive disk.
- Required: Inform Turnitin support of this path, so they can ensure Examplify is configured to save information to this path by default. This must be provided before your config file can be delivered to you.
- The persistent storage path must be partitioned on the computer's hard drive disk. If the persistent storage is set on a network drive, Examplify will not write to it.
- The existence of a persistent storage path will prevent you from receiving silent updates (refer to Examplify Updates section).
- Install Examplify in your lab environment.
This needs to be installed with administrator privileges or credentials.
- You can use these links to download the installers for the latest version of Examplify.
- If the download does not start after you select the link: Copy the link and paste it into a new browser tab or window.
- Install Examplify by following the prompts.
- Launch Examplify.
- Click “I agree” on the License Agreement.
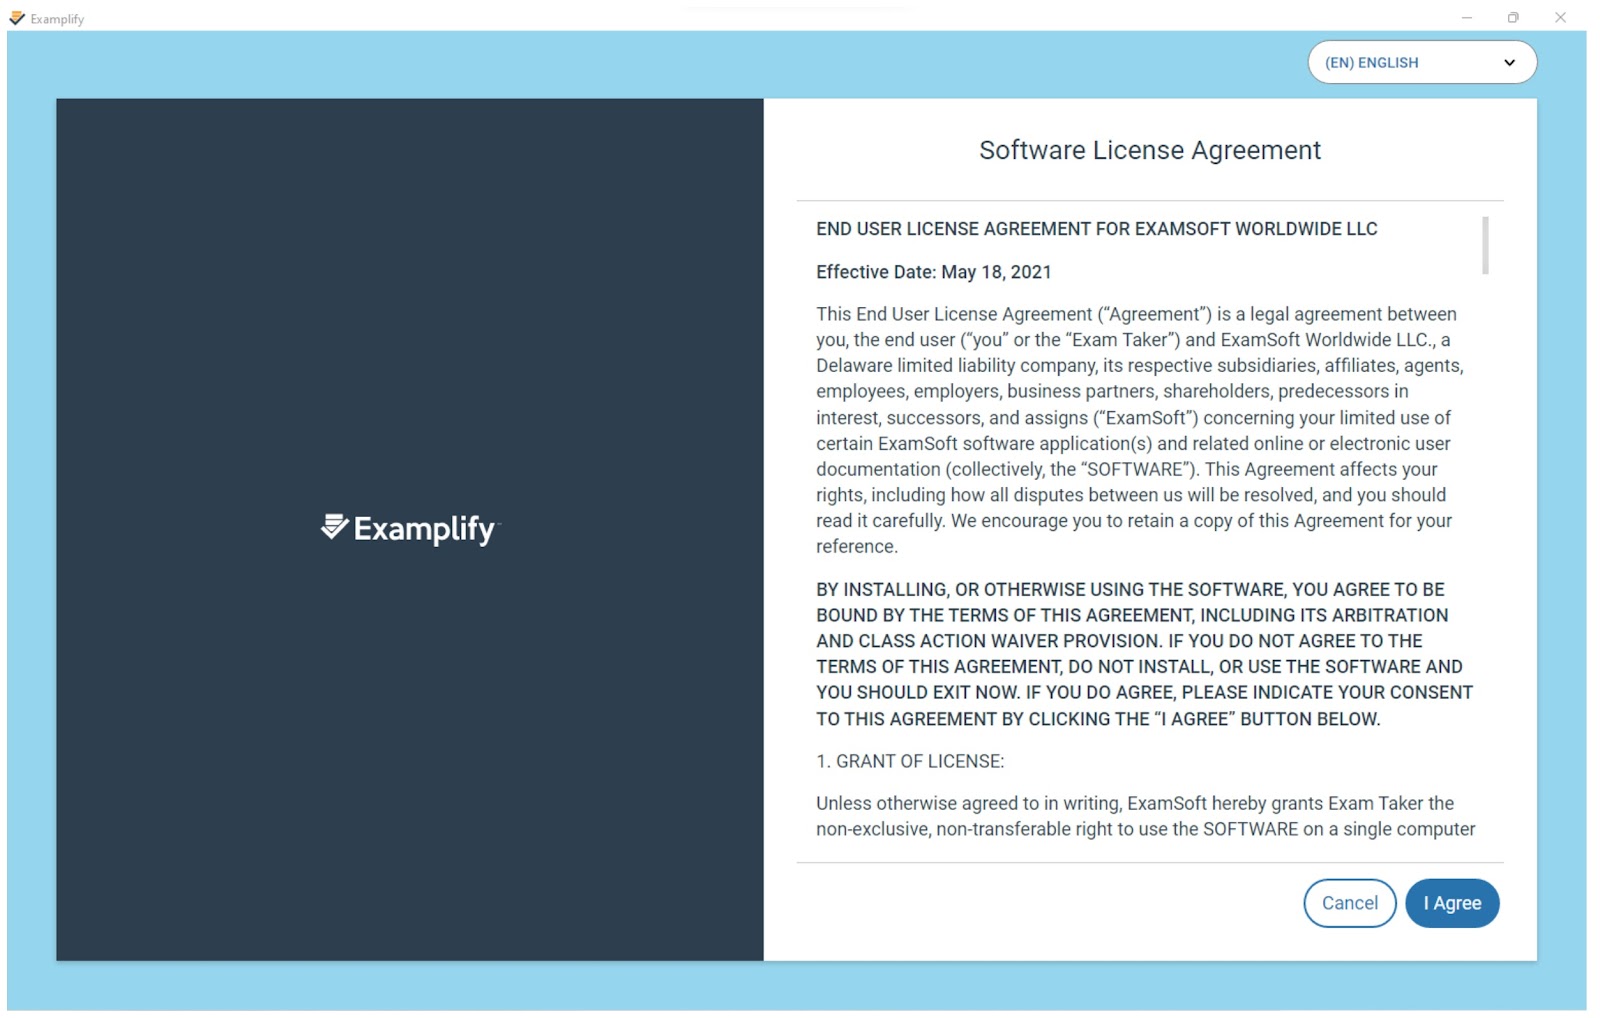
- Choose your institution.
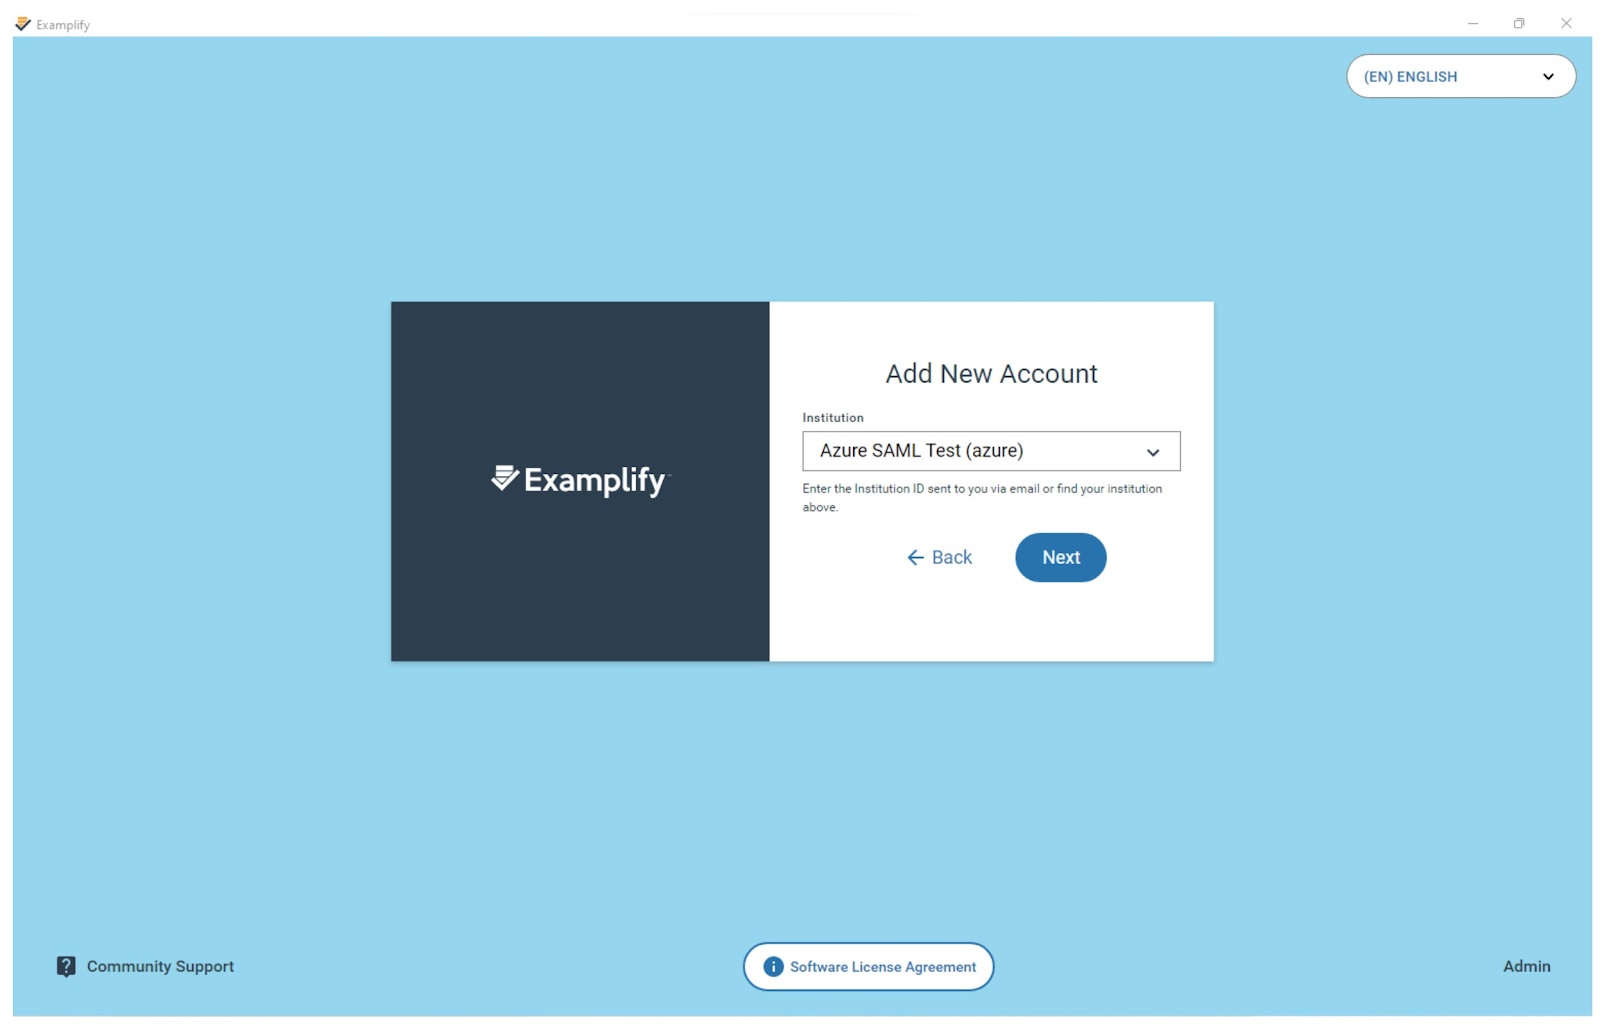
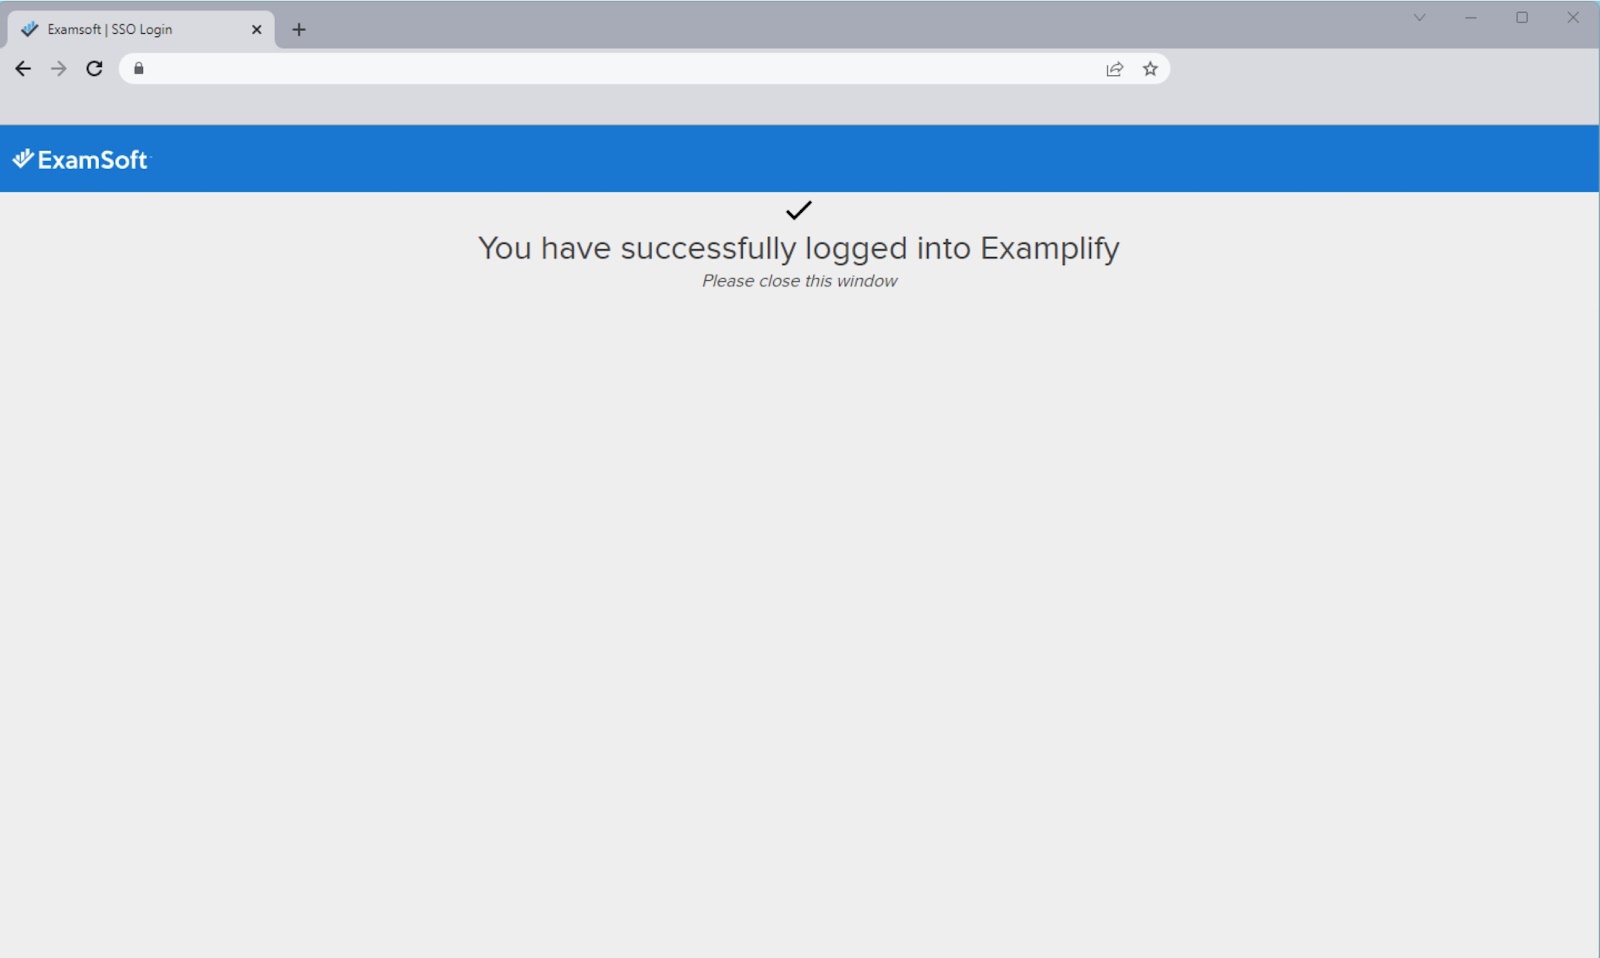
- If you use SSO (SAML/LDAP), you will be redirected to that webpage to sign in.
- Sign in using a lab user account, and you will see a confirmation window indicating you can close the window and return to Examplify.
-
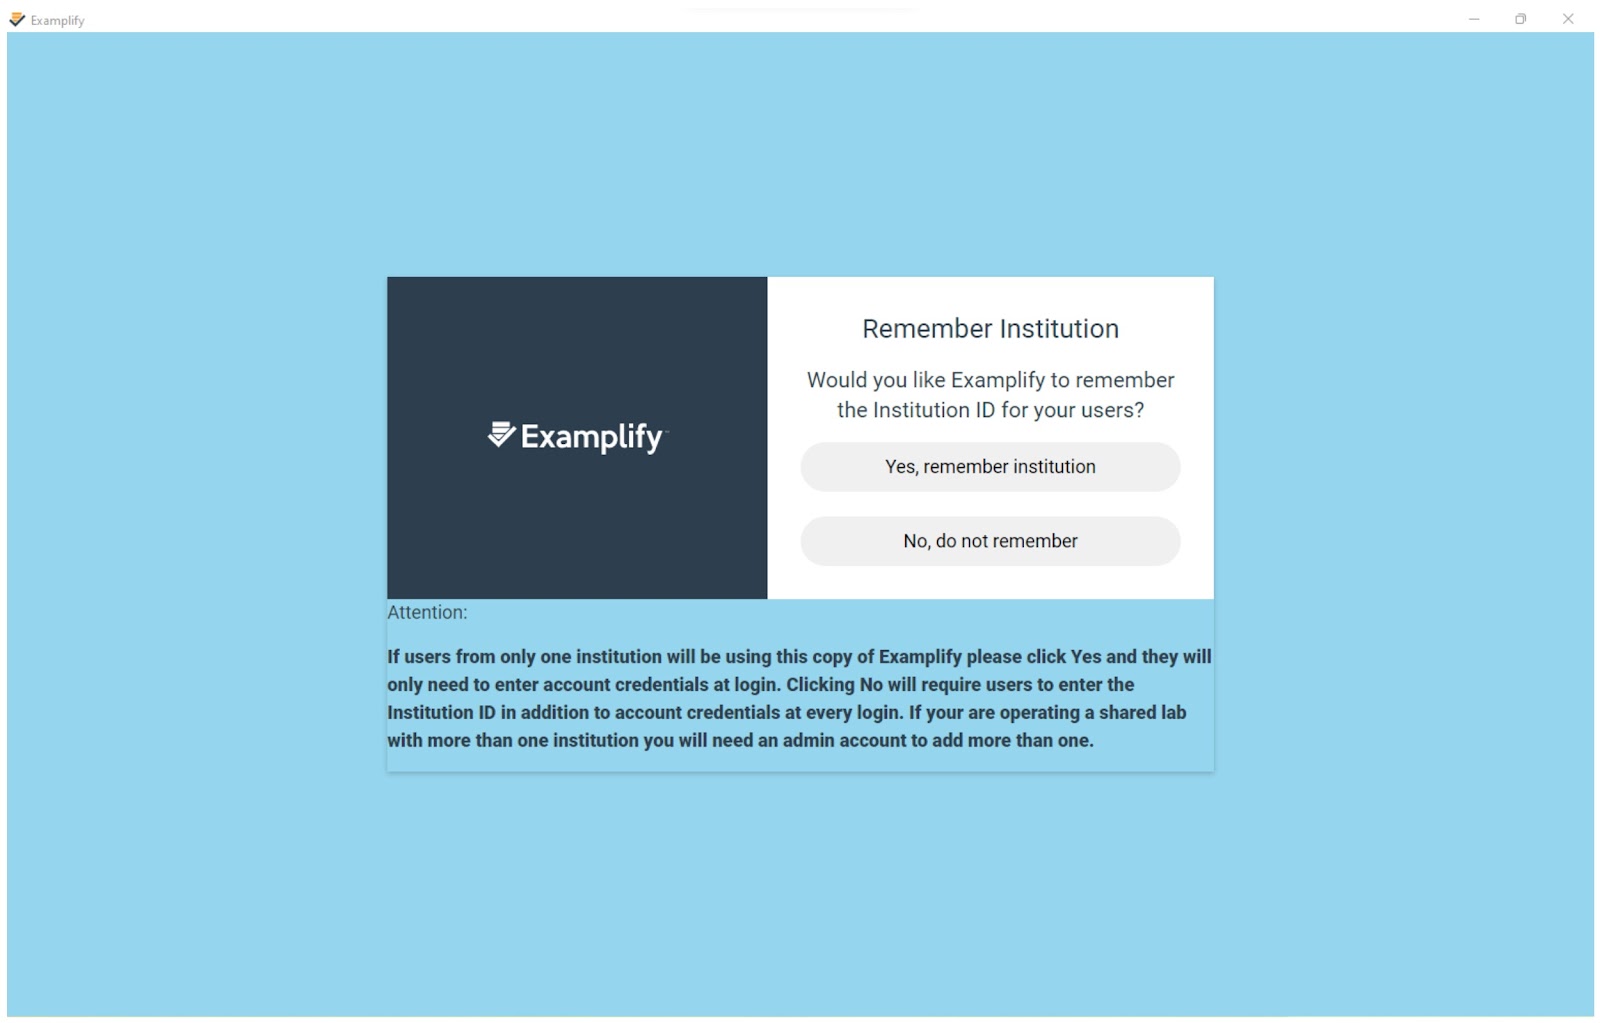
Once you have logged in, you will receive a prompt asking you if you wish to remember this institution.
- If you select No, exam-takers will be required to choose an institution upon the launch of Examplify.
-
If you select Yes, exam-takers will not be required to choose an institution upon the launch of Examplify.
-
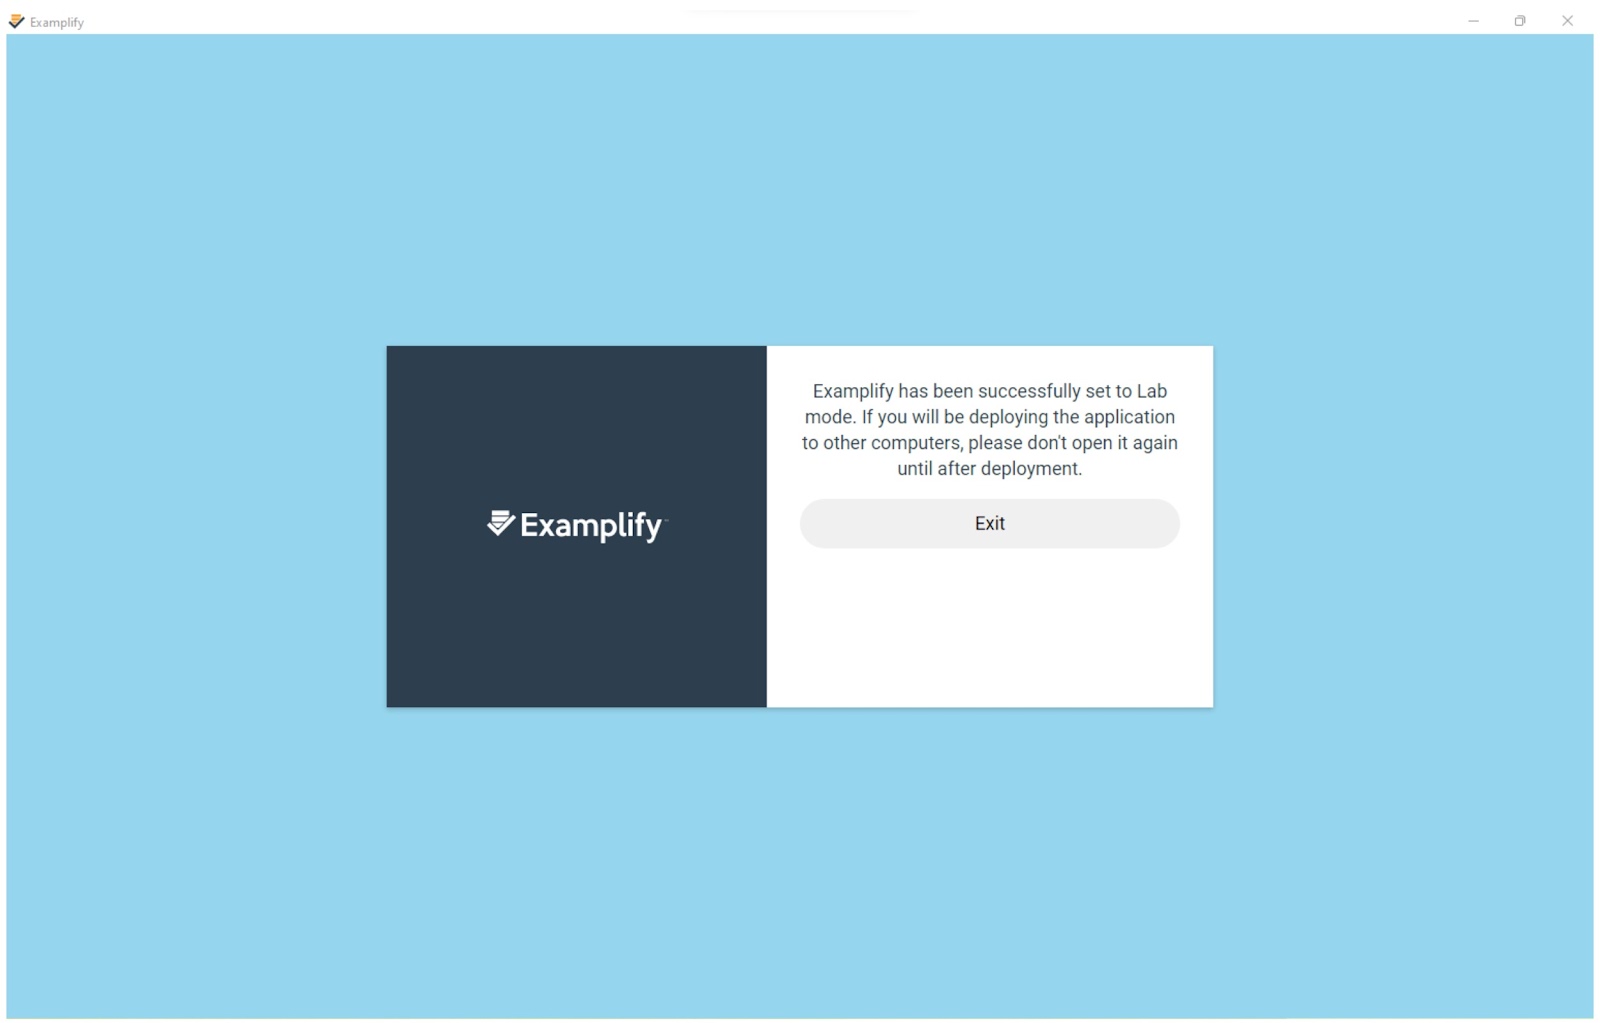
Click Exit on the screen that confirms you have set up your lab device.
- If you do not see this message, your device was not properly set up as a lab. Complete a clean uninstall of your device and perform the installation again following the prompts above. Ensure you use a lab user account to authenticate.
Examplify Updates
-
Automatic Updates
You cannot complete a silent update with a persistent storage path in place. If you use a persistent storage path, you will be required to use the Manual Update section below.- Examplify can download and install updates automatically, through the silent update process. This process requires an active internet connection, and Examplify cannot be currently in use.
- A silent update will not prompt the user to install the software. It will be automatically updated once the user is no longer in an active exam.
-
Manual Updates for Windows and macOS
- All Examplify Versions: You can install the latest updates by using the installers and following the steps described in the preferred installation type of this document for your institution. When you run the latest installer, the previously entered lab information is retained.
-
Manual Updates for Windows: Examplify 3.3.2 and greater using Systems Management Software or PowerShell
-
If you are using Windows and used systems management software or Windows PowerShell to do your installation, all of the steps to install the updates are identical to the original installation process, excluding the command:
- The update command is: Examplify_<version>_win.exe /s /v" /qn REBOOT=ReallySuppress"
- You will need an ISS file to run this command. (Contact Support for this file)
- “Manual” updates would be required if you are using a persistent storage path.
-
If you are using Windows and used systems management software or Windows PowerShell to do your installation, all of the steps to install the updates are identical to the original installation process, excluding the command:
The commands listed here do not apply to macOS.
Setup a Mac Lab
This is a detailed technical guide with an audience of information technology employees at an institution. Depending on your deployment, you may be required to have administrator privileges to systems management software or be able to run PowerShell/terminal commands on devices.
Verify Existing Lab Setup for macOS
-
Ensure that your device is set up correctly as a lab device. If lab.datn file is present in your \Library\Application Support\Examplify data directory, the device is properly registered as a lab device.
-
If you do not see this file in the above directory, and you are not installing 3.5.0 or later, you will need to perform a clean install. Click here to learn how.
-
If you do not see this file in the above directory, and you are not installing 3.5.0 or later, you will need to perform a clean install. Click here to learn how.
Which Lab Setup should I use?
Mac Lab using Systems Management Software
- Uses systems management software (such as JAMF) to install.
-
Ideal in situations where you cannot be on-site to complete each individual installation.
-
MSI installations are not supported today but will be in a future release of Examplify.
-
- Setup is for systems using Examplify 3.3.2 and greater.
Mac Lab using Terminal
- Best for users who wish to type in a command on Terminal and install without using prompts.
- Ideal in situations where you may be on-site to do individual installations, but your institution may or may not use systems management software.
- This setup is for systems using Examplify 3.3.2 and greater.
macOS Lab using Manual Installation
- A typical installation where you will install Examplify on each device.
- Ideal in situations where you may have a few loaned devices or a very small lab and do not need to utilize scripts to install software.
- This setup is for any version of Examplify.
Examplify 3.3.2 and Greater
Version 3.3.2 and beyond allows for an unattended installation of Examplify for lab computer systems.
Set Up Your macOS Lab using Systems Management Software
This version of the installation uses systems management software to install. This is ideal in situations where you cannot be on-site to complete each individual installation.
- If you’re using a single sign-on, such as SAML or LDAP, note that you must be using Examplify version 3.4.0 or higher. 3.3.2 does not support the ‘Remember my Institution’ feature.
Before you begin, you will need three files:
- SH File (contact Support for this file)
- JSON File (contact Support for this file)
-
Examplify version 3.3.2 or greater
- Download the Windows installer for Examplify 3.3.2 or greater from this location.
- Optional: It is recommended that you create a persistent storage path if your lab utilizes a systems management software. If your institution does not utilize a systems management software, you can skip this step.
- Systems Management Software products are applications that institutions use to manage lab computers and restore installations to original configurations. ExamSoft currently supports many systems management software if they can set a persistent storage path.
- A persistent storage path needs to be created for Examplify to write its working and backup files. This is a separate partitioned space on the computer's hard drive disk.
- The existence of a persistent storage path will prevent you from receiving silent updates (refer to Examplify Updates section).
- Required: Inform Turnitin Support of this path, so they can ensure Examplify is configured to save information to this path by default. This must be provided before your config file can be delivered to you.
- The persistent storage path must be partitioned on the computer's hard drive disk. If the persistent storage is set on a network drive, Examplify will not write to it.
- Install Examplify in your lab environment.
This needs to be installed with administrator privileges or credentials.
-
Download Examplify
- You can use these links to download the installers for the latest version of Examplify.
- If the download does not start after you select the link: Copy the link and paste it into a new browser tab or window.
- Save the SH and JSON File from Turnitin Support to the same directory as the Examplify executable file.
-
Using your software distribution system (such as JAMF), run the installer using this command:
- Change the directory location to where your JSON, SH, and DMG files are located.
-
Next, make the setup.sh file executable by adding in chmod +x setup.sh to your script.
-
If you miss this step, your installation will not be complete.
-
- Next, use the following script to install Examplify.
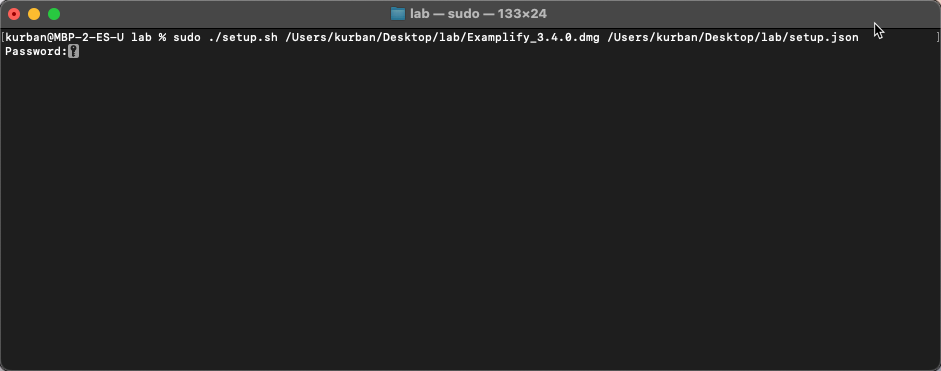
sudo ./setup.sh /<path>/Examplify_3.4.0.dmg /<path>/setup.json
-
-
- A password is required to complete this step.
-
Notes:
- Where setup.json = the name of your config file.
- If your JSON file contains SavedInstitutionDataForLabCopy for setting a default institution, an internet connection is required.
Note: If you have completed this process once and are doing an UPDATE to Examplify, the command is:
- Change the directory location to where your SH file is located.
- Next, make the setup.sh file executable by adding in chmod +x setup.sh to your script.
If you miss this step, your installation will not be complete.
- Next, use the following script to install Examplify.
sudo ./setup.sh /<path>/Examplify_3.4.0.dmg
-
Finalize and verify the installation by spot-checking a few of the machines.
- Ensure that Examplify starts and that the End-User License Agreement displays.
- Use any student credentials to log in and ensure it connects to the correct institution.
You do not need a lab user account to complete this installation process.
Set Up Your macOS Lab using Terminal
This is ideal in situations where you may be on-site to do individual installations, but your institution may or may not use systems management software. This installation is best for those users who wish to type in a command on Terminal and install without using prompts.
- If you’re using a single-sign-on, such as SAML or LDAP, note that you cannot use the Remember My Institution checkbox until a future release of Examplify.
Before you begin, you will need three files:
- SH File (contact Support for this file)
- JSON File (contact Support for this file)
-
Examplify version 3.3.2 or greater
- Download the Mac installer for Examplify 3.3.2 or greater from this location.
- Optional: It is recommended that you create a persistent storage path. If your institution does not want to set up a persistent storage path, you can skip this step.
By skipping this step, Examplify will install to the default directory.
- A persistent storage path needs to be created for Examplify to write its working and backup files. This is a separate partitioned space on the computer's hard drive disk.
- The existence of a persistent storage path will prevent you from receiving silent updates (refer to Examplify Updates section).
- Required: Inform Turnitin Support of this path, so they can ensure Examplify is configured to save information to this path by default. This must be provided before your config file can be delivered to you.
- The persistent storage path must be partitioned on the computer's hard drive disk. If the persistent storage is set on a network drive, Examplify will not write to it.
- Install Examplify in your lab environment.
This needs to be installed with administrator privileges or credentials.
-
Download Examplify
- You can use these links to download the installers for the latest version of Examplify.
- If the download does not start after you select the link: Copy the link and paste it into a new browser tab or window.
- Save the SH and JSON File from Turnitin Support to the same directory as the Examplify executable file.
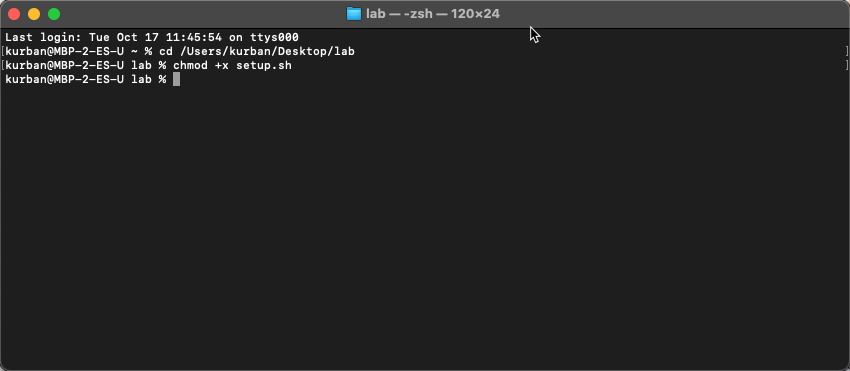
- Open Terminal.
- Change your directory to the location where you stored the above 3 files.
-
Run the installer using this command.
- Change the directory location to where your JSON, SH, and DMG files are located.
-
Next, make the setup.sh file executable by adding in chmod +x setup.sh to your script.
-
If you miss this step, your installation will not be complete.
-
-
Next, use the following script to install Examplify.
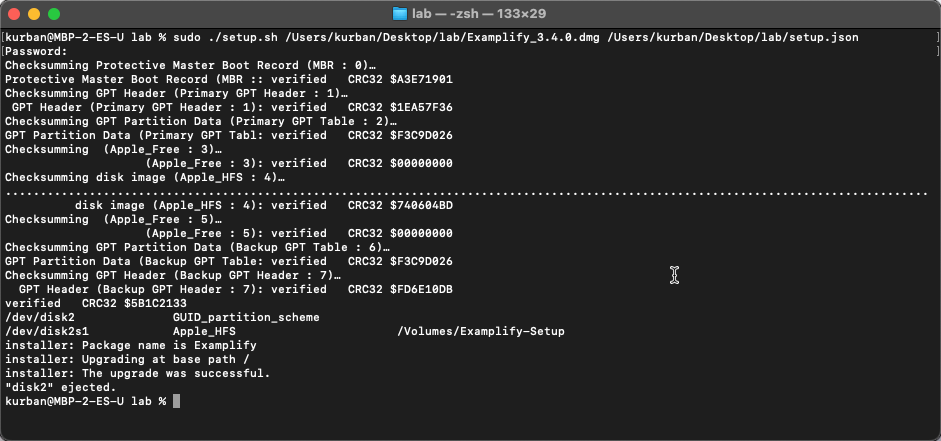
- sudo ./setup.sh /<path>/Examplify_3.4.0.dmg /<path>/setup.json
- A password is required to complete this step.
Your Terminal window will look like this when it is complete:
Note: If you have completed this process once and are doing an UPDATE to Examplify, the command is:
- Change the directory location to where your SH file is located.
- Next, make the setup.sh file executable by adding in chmod +x setup.sh to your script.
If you miss this step, your installation will not be complete.
- Next, use the following script to install Examplify.
sudo ./setup.sh /<path>/Examplify_3.4.0.dmg
-
Finalize and verify the installation by spot-checking a few of the machines.
- Ensure that Examplify starts and that the End-User License Agreement displays.
- Use any student credentials to log in and ensure it connects to the correct institution.
Set Up Your macOS Lab using Manual Installation
This is ideal in situations where you may have a few loaned devices or a very small lab and do not need to utilize scripts to install software. This is a typical installation where you will install to each device.
Before you begin, you will need:
- Examplify lab user account
-
Downloaded copy of Examplify
- Download the macOS installer for Examplify from this location.
- Optional: It is recommended that you create a persistent storage path. If your institution does not want to set up a persistent storage path, you can skip this step.
By skipping this step, Examplify will install to the default directory.
- A persistent storage path needs to be created for Examplify to write its working and backup files. This is a separate partitioned space on the computer's hard drive disk.
- Required: Inform Turnitin support of this path, so they can ensure Examplify is configured to save information to this path by default. This must be provided before your config file can be delivered to you.
- The persistent storage path must be partitioned on the computer's hard drive disk. If the persistent storage is set on a network drive, Examplify will not write to it.
- The existence of a persistent storage path will prevent you from receiving silent updates (refer to Examplify Updates section).
- Install Examplify in your lab environment.
This needs to be installed with administrator privileges or credentials.
- You can use these links to download the installers for the latest version of Examplify.
- If the download does not start after you select the link: Copy the link and paste it into a new browser tab or window.
- Install Examplify by following the prompts.
- Launch Examplify.
- Click “I agree” on the License Agreement.
- Choose your institution.
- If you use SSO (SAML/LDAP), you will be redirected to that webpage to sign in.
- Sign in using a lab user account, and you will see a confirmation window indicating you can close the window and return to Examplify.
-
Once you have logged in, you will receive a prompt asking you if you wish to remember this institution.
- If you select No, exam-takers will be required to choose an institution upon the launch of Examplify.
-
If you select Yes, exam-takers will not be required to choose an institution upon the launch of Examplify.
-
Click Exit on the screen that confirms you have set up your lab device.
- If you do not see this message, your device was not properly set up as a lab. Complete a clean uninstall of your device and perform the installation again following the prompts above. Ensure you use a lab user account to authenticate.
Examplify Updates
-
Automatic Updates
You cannot complete a silent update with a persistent storage path in place. If you use a persistent storage path, you will be required to use the Manual Update section below.- Examplify can download and install updates automatically, through the silent update process. This process requires an active internet connection, and Examplify cannot be currently in use.
- A silent update will not prompt the user to install the software. It will be automatically updated once the user is no longer in an active exam.
-
Manual Updates for macOS
- All Examplify Versions: You can install the latest updates by using the installers and following the steps described in the preferred installation type of this document for your institution. When you run the latest installer, the previously entered lab information is retained.
Setup an iPad Lab
Setting up Examplify for iPad to work within a lab environment allows exam-takers to share the same device for test taking. Every time an exam is uploaded, the app will prompt the user to authenticate again.
Important: Examplify for iPad lab environments can only be set up when initially installing the app for the first time.
Procedure
- Create an Exam-Taker account as a Lab User. This will be the account used to register Examplify.
Note: For more information on setting up an Exam-Taker account, please see: Legacy Portal: Add and Manage Exam-Takers
- Download the latest Examplify build, see Examplify for iPad: Download and Install Examplify, and follow the instructions.
- Double-tap to open the Examplify app.
- Read the Software License Agreement and select I Agree to accept.
- Open the drop-down menu, or begin typing the name of your institution and select it from the list.
- Select Next.
- Enter the Lab User's Exam-Taker credentials, and then select Sign In.
A prompt will confirm that the device has been successfully set up in Lab mode.
- Select OK to log in.
After Setup
Now that the device is set up in Lab mode:
- Exam-takers will be logged out of the application once their assessment has been successfully uploaded.
- The Switch User feature is disabled.